Estimating liner wear life
In order to maintain the power draw, liner wear is compensated for by adding grinding media; therefore liner wear is estimated by measuring the ball charge increase.
Static ball charge measurement
The mill must be stopped for the static ball charge to be measured. Drop the weighted rope in the ball port at the same reference point on the ball port as the initial ball charge reading. The distance between the first mark on the rope and this second mark is the depth of the ball charge.
NOTE: This measurement can only be taken with the mill stopped.
Record the static ball charge on the Commissioning Data Sheet once every month for new mills and every other month for others to improve the accuracy of the wear life estimate.
Operating parameters to be recorded at the same time as the static ball charge:
- Power draw
- Operating hours/tonnage
- Percent solids (by weight)
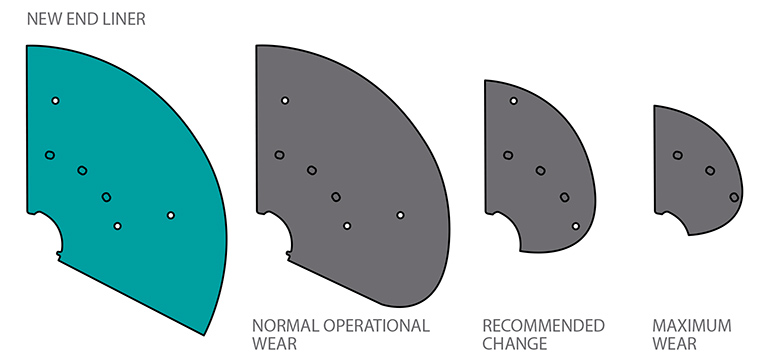
When the static ball charge level has risen by 300 mm (1 foot), it is an indication of a worn screw liner and a liner inspection/change is recommended. This is applicable only for mills operated with a constant power draw.
After any liner change, a new initial ball charge should be measured/recorded, followed by a repeat of the above procedure.
Measuring liner wear
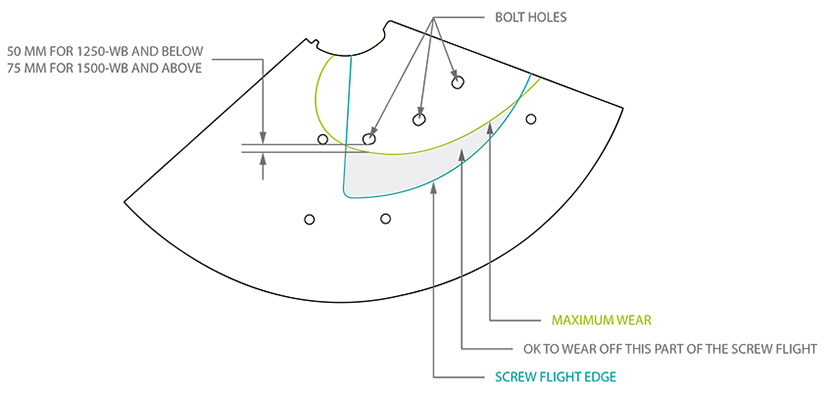
VTM liners have a relatively complex geometry, but they can be measured using standard measurement tools with the following procedure.
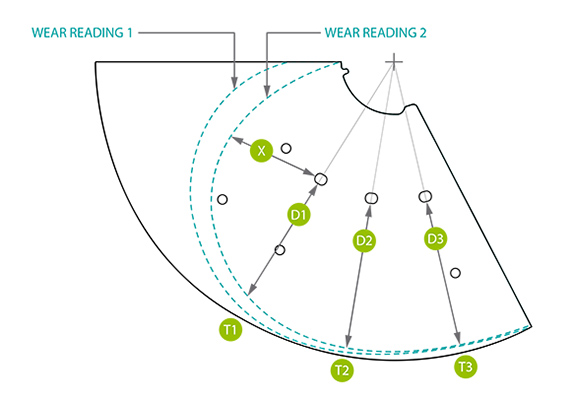
Aim for the center of the screw shaft and go through the bolt holes when picking a point to:
- Measure the thickness (T1, T2, T3); do this at the same place every time.
- Measure the distance from the bolt holes to the outer edge (D1, D2, D3).
- Measure the shortest distance to the lowest bolt (X).

